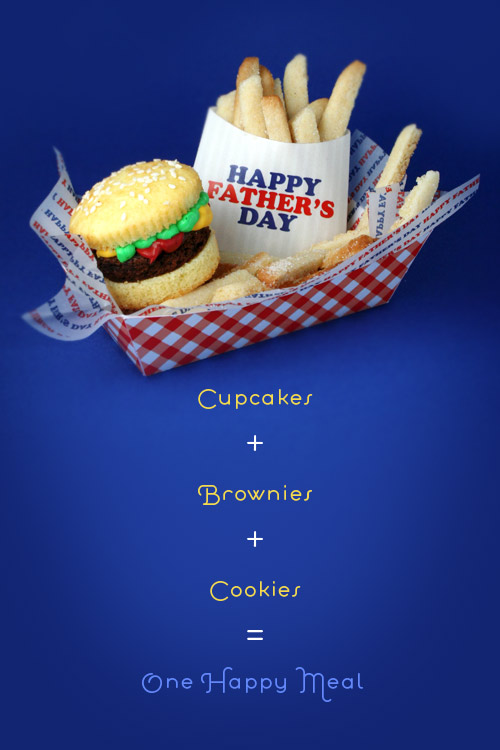
Cupcake Buns + Brownie Burgers + Cookie Fries = One Happy Meal!
Or many…
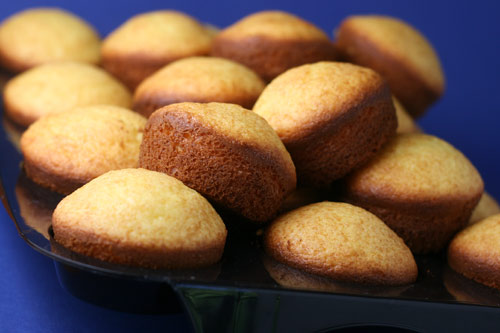
I can hardly stand how cute these little guys are. You've probably seen them around before. I know I have. Cupcakes Take The Cake has featured cute ones. But, they are even cuter in person as I discovered this weekend. Oh my gawd… they just make me want to smile. I switched mine up a little by doing the burger out of brownies. But, you can just as easily make chocolate cupcakes and cut them in thirds to use instead. And if you want more realistic lettuce, tint some coconut (yuck) green.
I really decided to make these when I thought about making a meal out of them for Father's Day, complete with sugar cookie french fries. I wasn't sure if they would turn out, but I am so thrilled with the end result. Actually, I think the fries might be my favorite part.
Before I started baking, I made a template for a miniature paper box tray and french fry holder. You can download the 4-page pdf (636 KB) here if you want it. The pdf contains the tray template, french fry holder template (blank & with Happy Father's Day). It also includes the design for the Happy Father's Day tissue paper.
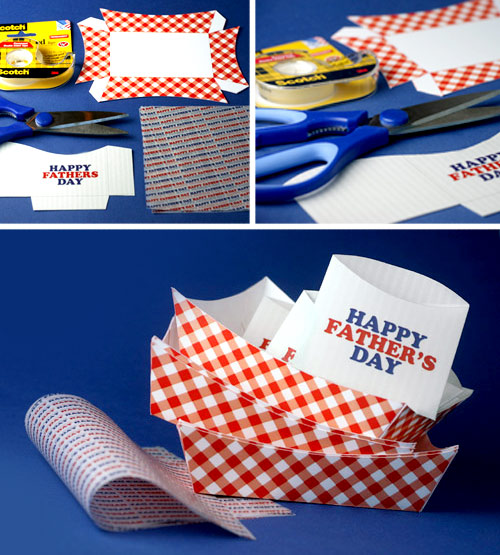
I printed the tray template on card stock
All three paper weights went through my printer fine - one sheet at a time to be safe. But, if you're unsure about running the tracing paper through your printer, then just use regular plain white tissue paper.
Cut out the shapes as shown in the picture above with scissors or a sharp blade. Then fold along all the printed lines. Use double-sided tape to secure the flaps. Cut the tissue paper in half and place in the tray print side down.
Now, for the baking. Keeping with the fast food fun theme, I went all mixes on these. That's right. I said mixes. For the cookies, brownies and the cupcakes. Don't cringe.
You know I love learning to bake new things from scratch because it's really empowering and satisfying and it usually tastes better, too. But, before a couple of years ago, I did all my baking from a box and really don't have a problem using a mix. There, I said it. I feel better now.
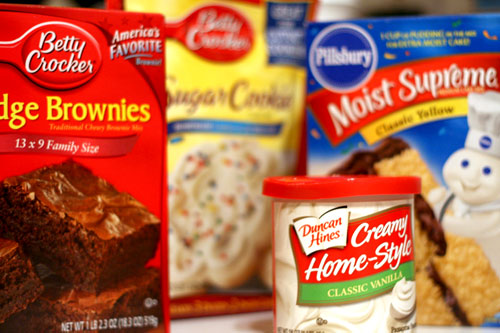
So, I picked up several kinds.
The brownies baked first in a 13 X 9 pan. You don't need any help there.
The cookies came next. I wanted to do rolled sugar cookies and luckily Mrs. Crocker offered some tips on how to convert the mix for better results.
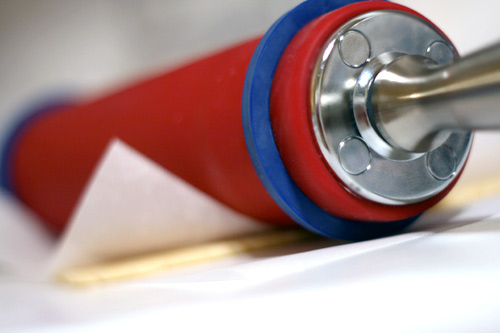
Except I didn't do the whole floured surface thing. I used parchment paper underneath and on top of the dough. Then I rolled it out with a rolling pin using rubber band spacers
See… perfectly even dough and a clean surface.
Here's where I started experimenting, but it worked out pretty well.
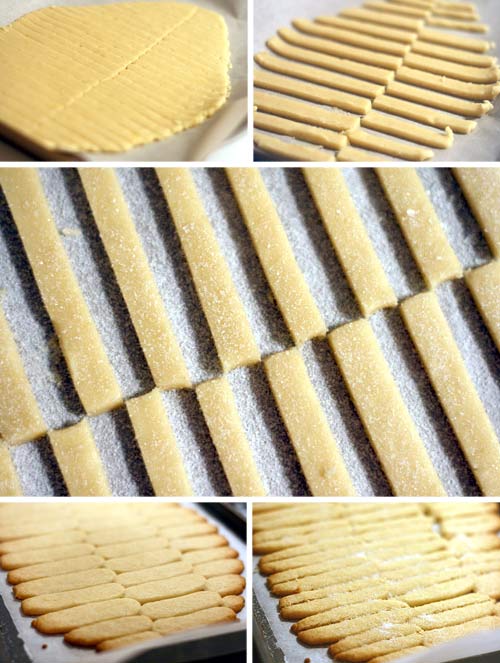
Cut the dough in thin strips with a sharp knife and then a long cut down the center. The varied lengths are fine because you don't want all your french fries exactly the same size. Remove the alternating strips so it won't bake into one giant blob. (Reserve dough strips and repeat) Sprinkle sugar on top of the dough. Bake for about 8 minutes at 350 degrees.
These spread more than I had hoped they would for rolled sugar cookies. I know. I know. The mix thing. But, no problem. Just take your knife and cut each "steak fry" down the center for "skinny fries." Do this right when they come out of the oven. Sprinkle more sugar on top while they are still warm, too. Lightly rub it on to make sure it sticks good.
And voila……
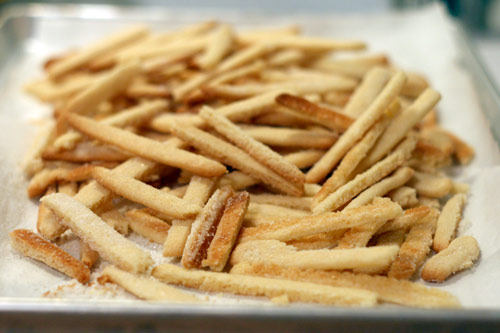
A big pile of fries. Yum! Try not to eat too many before you serve them. You can't eat just one. Trust me.
Next up… cupcakes. I made these the next morning to spread out the work.
Boxes, brownies, and fries on one day. Cupcakes and decorating the next.
I baked 24 cupcakes using a yellow cake mix. I also exchanged 1 cup of buttermilk instead of the water. It made them nice and yummy. To test, I greased and floured one 12-cup cupcake tray and used Pam on the second. I wanted my buns to have smooth sides, you know. Well, they came out smooth, but also brown.
You can see what's coming.
Yes. Yes. I made 24 more cupcakes. This time I used milk instead of water. No reason. Just to try it.
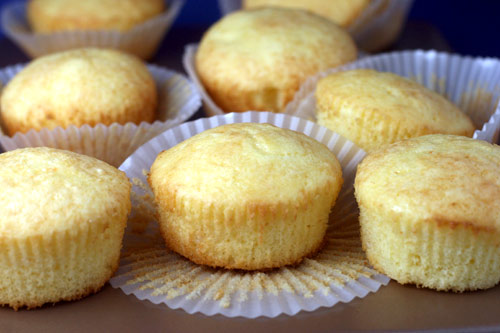
They were good, too. And this time I used paper liners to ensure the right color cupcake bun.

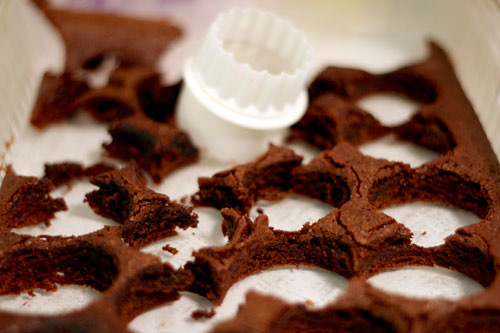
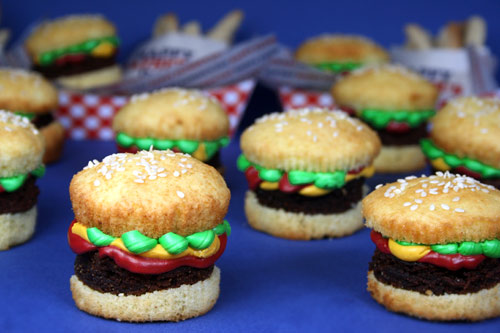
Now it's time to assemble. Cut each cooled cupcake in half or thirds depending on how tall it is. Cut out 24 circles from the completely cooled brownies and place in between the cupcake bun.
I used my ever so handy graduated circle cutters
Then… and this might be the most important thing.
Take a break and dispose of the scraps……
… You'll figure something out.
Next up. Frostings.
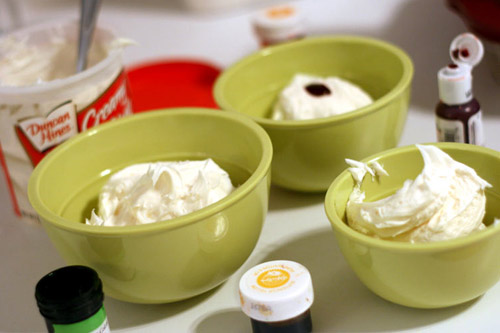
Divide the canned frosting in three bowls. Two can have equal amounts for the mustard and ketchup. The third - a little more for the lettuce. The colors I used to tint were, Wilton Leaf Green

Perty!
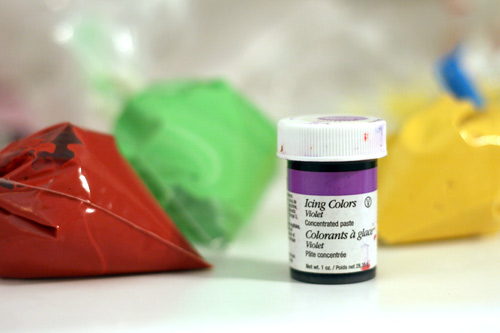
To make the red a little deeper, use a tiny bit of violet when you mix. Place each color in a ziploc bag and snip a small tip off one corner.
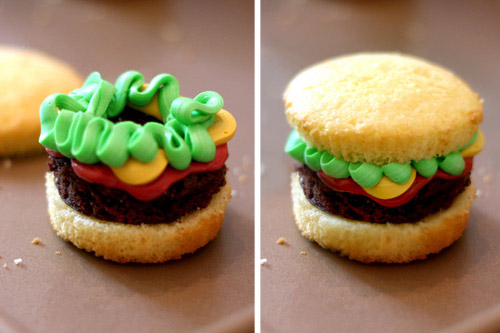
Gently squeeze out the mustard and ketchup first. Then the lettuce in more of a squiggly design. Place the top of the bun on and press gently.
Now for the finishing touch. Brush a very thin layer of water over the top of the bun or either dab a few drops of water on with your finger. Sprinkle sesame seeds on top and they'll stick.
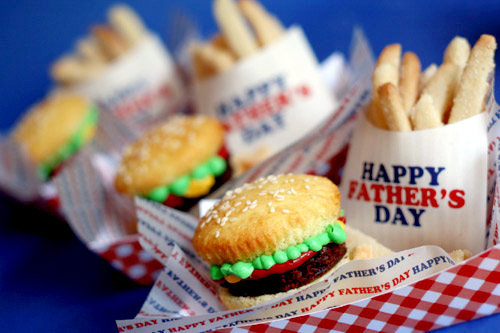
There you have it.
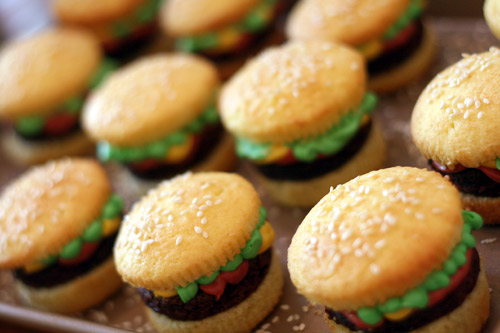
Brownie Burger Cupcakes
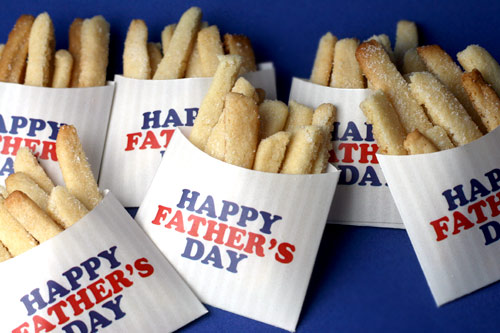
And Sugar Cookie French Fries.
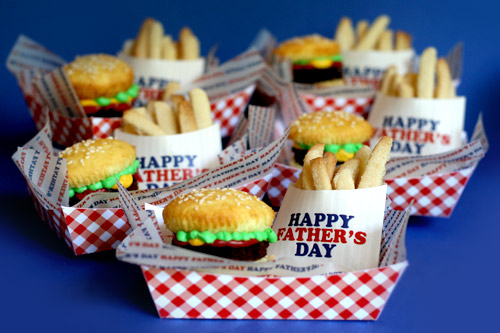
A perfectly sweet meal for Dad's day or any day.
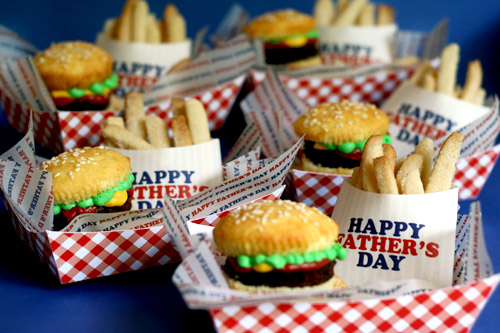
And, if you use this template, there's a blank french fry holder in it. Use it and you can serve these for a family cookout or Fourth of July party.
People will go crazy for them, don't you think.
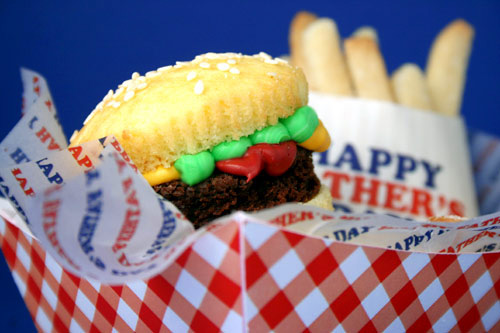
Man, that's one good looking burger. So thick … and…

Tasty, too! Hope you like them.
Now, I'm curious. When it comes to mixes, how do you roll?
Use them? Refuse them? Or improve them?