Showing posts with label easter. Show all posts

Wednesday, April 8, 2009

Eye Candy

Mini Easter Basket Cupcakes

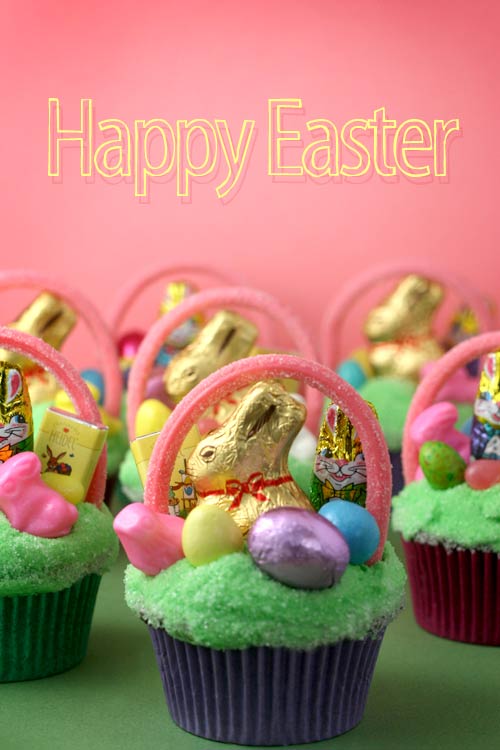
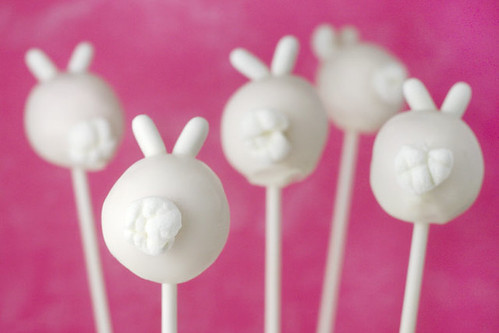
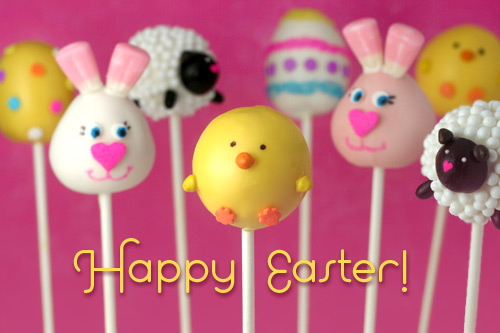
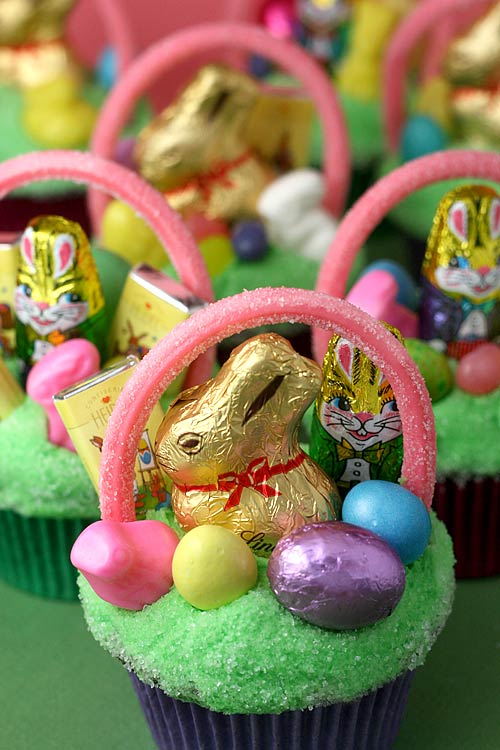
I absolutely had the most fun making these Miniature Easter Basket Cupcakes. I know this idea has been done a ton of different ways before, but I couldn't resist having a go at them. They are so sweet and make me giddy just looking at them.

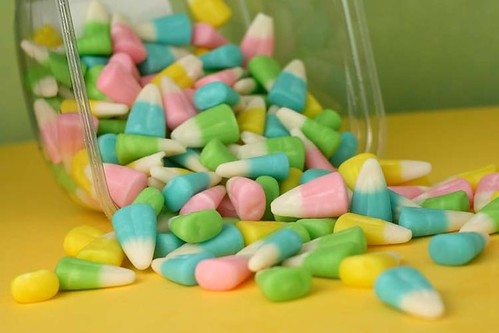
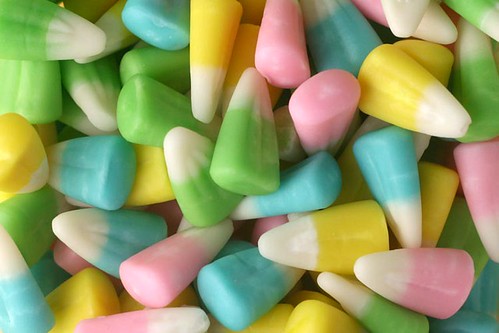
Plus, I had all this Easter candy that I had to do something with.

Easter Candy

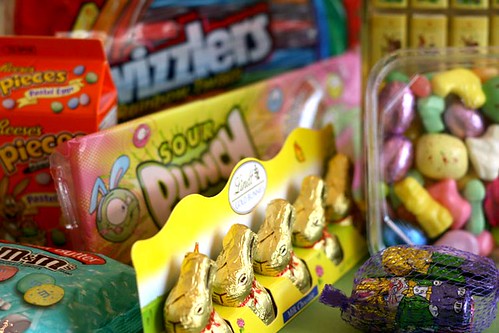
Mini Chocolate Bunnies, candy eggs, sour patch straws and mini chocolate candy bars. (Can you say sugar coma.) The bunny candy to the right came from The Fresh Market. And, the Twizzlers made it in this photo, but not on the cupcakes. I'll have to save them for later.

Intense

Here's some of my favorite baking cups. I loooooove the opaque color of these. You can get them at the Confectionery House.

Or if you like polka-dots, check these out.

Polka Dot Cupcake Liners

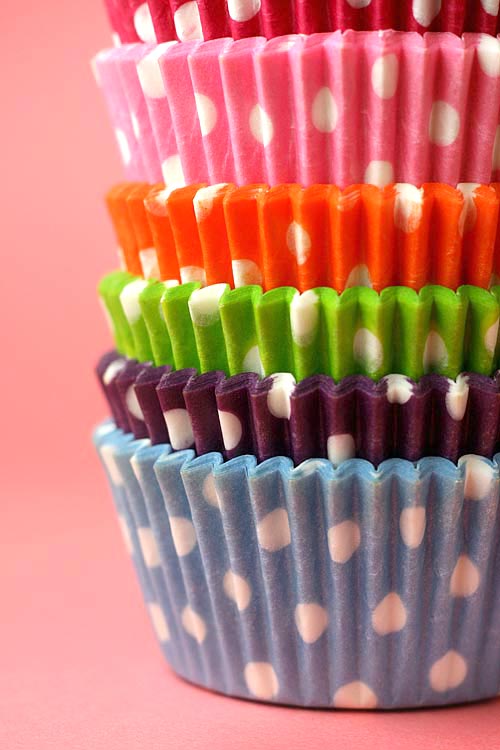
Their color isn't as opaque after baking, but the dots sure do make up for it. Also from the Confectionery House.

So, if you have a bunch of easter candy handy, get busy and go make some cupcakes. I made chocolate.

Chocolate Cupcakes

2 1/4 cups all-purpose flour
2/3 cup cocoa
1 1/2 tsp baking soda
1 1/2 tsp baking powder
1/2 tsp salt
2 cups sugar
3/4 cup unsalted butter, room temperature
3 eggs, room temperature
1 1/4 c milk, room temperature
1 tsp vanilla
  • Preheat oven to 350 degrees.
  • Prepare cupcake pans with 36 baking cups.
  • With a wire whisk, sift together flour, cocoa, baking soda, baking powder, and salt in a large bowl and set aside.
  • In a mixer, cream sugar and butter.
  • Add eggs one at a time, scraping down sides with each addition. Add vanilla.
  • Add flour mixture to the creamed butter in three additions, alternating with the milk in two additions. (flour, milk, flour, milk, flour)
  • Bake for about 15 minutes or until done.
  • Cool and frost.

They were pretty good, but I'm still looking for my "go to" chocolate cake recipe.

Then, I made some yummy buttercream frosting and tinted it green. (Here's a recipe.) You'll want to double it at least if you decide to frost all 36 cupcakes.

Buttercream Frosting

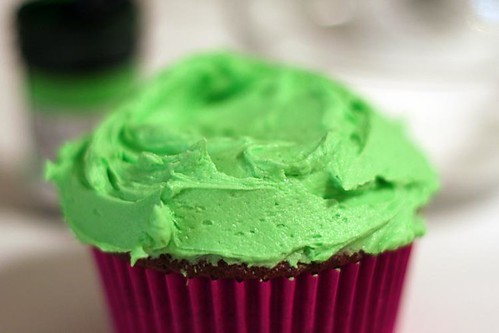
Use a generous amount of frosting. It doesn't have to be too pretty.

Buttercream Frosting

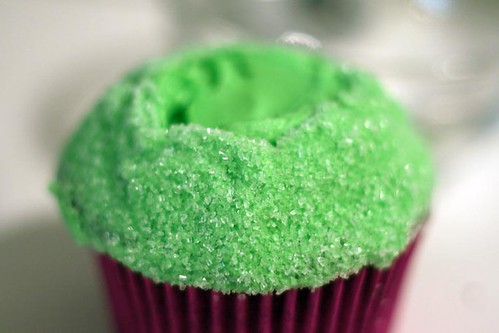
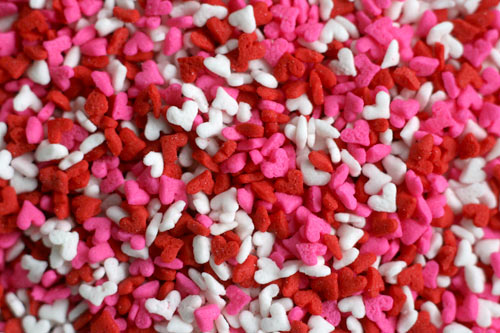
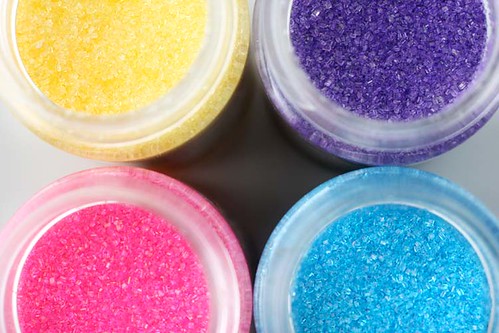
Then dip the sides of the frosting in a small dish filled with sugar crystals or sanding sugar. You don't have to cover the center area because that's where your chocolate bunnies will go.

Sour Punch Strawberry Straws

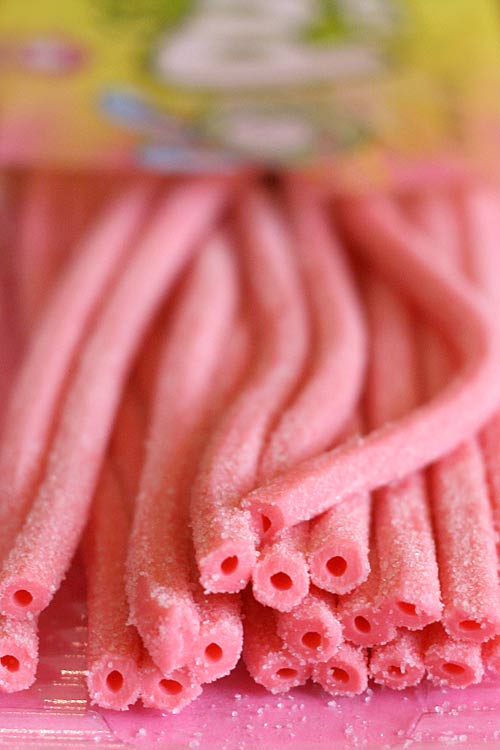
You can use these super cute Sour Punch Straws for the handles. Just insert into the cupcake on each side. (They also come in green.)

Lindt Chocolate Bunny Basket

Then cover your cupcakes with candy. EASY!

I love the look of these Lindt chocolate bunnies.

Heidl Mini Candy Bars

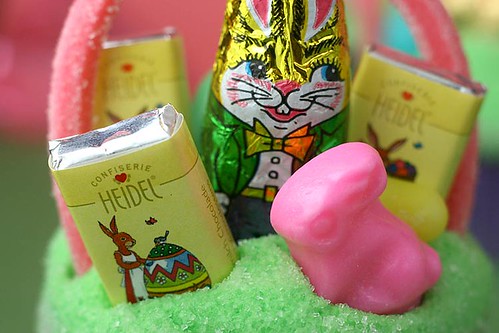
And I looooooove these super tiny Heidl candy bars. (But, I'm a sucker for anything mini if you haven't guessed that about me already.)

Candy Covered Cupcakes

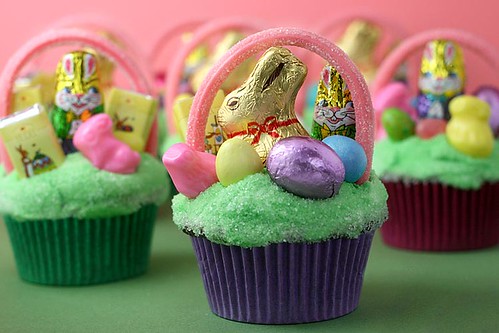
Decorate each one differently to give them more personality.

Then, you can package to give away as individual treats.

Strano Designs

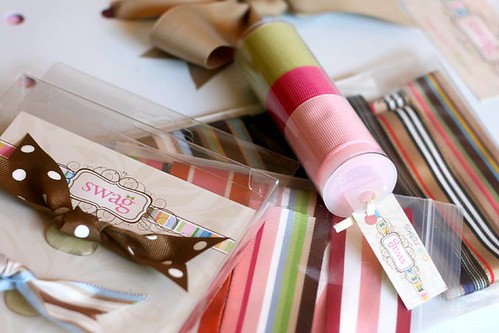
I used some really pretty striped ribbon that Strano Designs gave me a while ago.

Pretty Ribbon

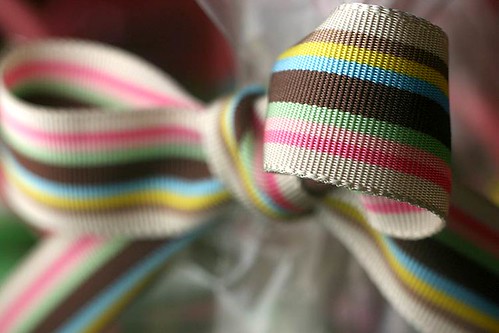
Check them out: www.stranodesigns.com

Yellow polka-dot ribbon

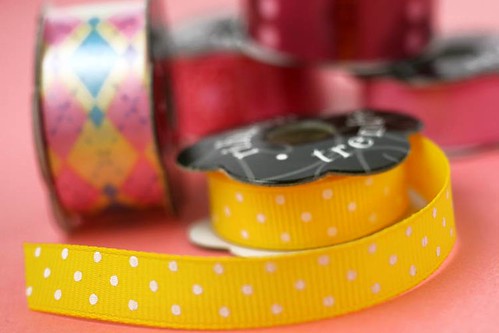
And this smaller yellow one that I found in the scrapbooking section of Hobby Lobby.

Mini Easter Basket Cupcakes

Cute or What?!

To get these to stand up, cut out some white cake board to fit the bottom of a plastic treat bag (These were 5" X 11" X 3" from Hobby Lobby). Apply a small amount of frosting to the center of the board to help keep the cupcake from sliding back and forth. I just wish these bags weren't so wide. I had wanted them to be closer to the width of the cupcake.

But, not to worry. Nobody I gave them to cared one little iota about wide cardboard.

Happiness!

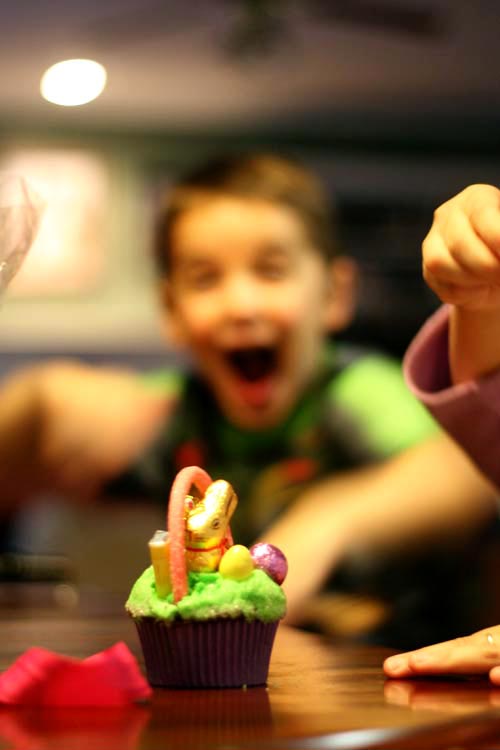
See what I mean. You know, I didn't even notice his excitement when I took this picture because I was focusing on the cupcake. I can't even stand how sweet this expression is.

Thrilled

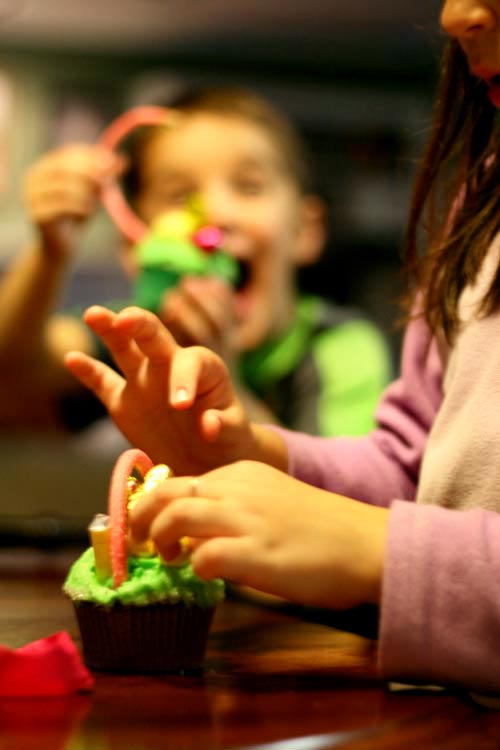
Or this one. Precious.

Happy Easter Baskets

Wednesday, April 1, 2009

I have a problem.

Sheep Cake Pops

I can't stop making these pops.

Every time I finish making a batch, I tell myself that's it. No more. I'm done. And, then the next thing I know, I'm buying more lollipop sticks. You know, just in case. The funny thing is, I have several bags of lollipop sticks. I buy them every time I see them. And in different sizes. I don't do this with the other supplies, just the sticks. It's weird. I can't explain it. I guess I'm afraid there will be a stick shortage or something.

But, don't worry, these are the last of the Easter Cake Pops. Promise. Thanks for hanging in there with me.

To decorate the sheep, I used some…
Sugar Pearls
Itty Bitty Heart Sprinkles

Mini Heart Sprinkles

Teeniny tiny. But HUGE cuteness factor.

Sheep Cake Pops

Sugar pearls for the body and tiny hearts for the noses. The ears are brown rainbow chip sprinkles and the eyes are melted candy coating dotted on with a toothpick.

Licorice Bridge Mix

I also used this candy mix (called Licorice Bridge Mix) that I found at the Fresh Market. The buttons were for the head and the pastels, cut in half, were for the legs.

Sheep Cake Pops

All in all… super cute. And also, super crunchy. I had never eaten sugar pearls before and thought they were too high on the crunch to cake ratio for me. But, if you like crunchy cake, you're set.

Now, if you don't like crunchy cake, then you might want to try these instead.

Bunny Cake Pops

So, I lied. These are the last of the Easter Cake Pops.

Little bunny bodies. I about ran out of steam on these. I think you can tell by the effort I put into their faces. But, that's okay, because their bottoms are so cute.

Bunny Bottoms

Little bunny bottoms! Can you stand it? You want to bite them, don't you?

Want to make some? Read the basic cake pop instructions first and then use the decorating tips below for the bunnies and sheep.

Sheep Cake Pops

White Candy Melts
Sugar pearls
Licorice Bridge Mix (buttons for heads and pastels cut in half for legs)
Tiny Heart Sprinkles (noses)
Rainbow Chip Sprinkles (ears)
Paper Lollipop Sticks
Styrofoam Block
Toothpicks
  • Shape the cake mixture into an oval shape. Chill until firm.
  • Dip a lollipop stick in a little of the white chocolate and insert into the body almost halfway.
  • Then dip the sheep body in a bowl of melted white candy coating. Make sure the bowl is deep enough to dip and remove easily.
  • Tap off any excess coating.
  • When you make these, it's best if the candy coating has set out for a few minutes after being heated. Because when you remove the pop from the coating, you will want to go ahead and attach the head, then the feet and then sprinkle on the sugar pearls. It's really a timing thing. If it's too hot, the adornments will slide off and if it has cooled too long, the chocolate will set before you can finish attaching everything. But not to worry, if that happens, then reheat the coating and use it as a glue to attach things.
Note: sprinkle the sugar pearls over a big bowl because these little guys are hard to catch. I'm still finding them in odd places.


Bunny Cake Pops

White Candy Melts
Tic Tac CHILL mints (ears)
Tiny heart sprinkles (noses)
Mini marshmallows (tails)
Pink and blue edible ink pens
Styrofoam Block
Toothpicks
  • Shape the cake mixture into an oval shape. Chill until firm.
  • Dip a lollipop stick in a little of the white chocolate and insert into the body almost halfway.
  • Then dip the bunny body in a bowl of melted white candy coating. Make sure the bowl is deep enough to dip and remove easily.
  • Tap off any excess coating.
  • Insert the tic tac CHILLS in place for the ears. Don't push too far in or they might crack later. Let dry.
  • For the tails, use a knife and make criss-crossing indentions on a mini marshmallow. Don't cut through, just enough to give a cottontail effect. Attach the tails with melted candy coating and let dry.
  • Use a toothpick to place a dot of candy coating for the nose and attach a tiny heart sprinkle.
  • Draw on the faces.
  • Bite their bottoms.
Note: The tic tacs worked for the size, but feel free to try something else with a less minty surprise.


Happy Easter Cake Pops

And now, I'm outta here. I need to go buy more sticks. You know, just in case.

Sunday, March 29, 2009

Easter Cake Pops, Part Two

The Easter Chick Cake Pops from last week were certainly cute. FYI, the all body ones with feet were hands down the winner. Actually it was a beat down. I almost feel sorry for the other chicks. Thanks everyone for your input. But, even with all their cuteness, I couldn't let Easter pass by without trying my hand at some bunnies. So, here they are…

Easter Bunny Cake Pops

Check out those ears! I found some pastel "Bunny Corn" at The Fresh Market. SCORE! Yes, it really said that on the container. So cute. The name alone practically made me buy them, not to mention, as soon as I saw them, I thought … bunny pops. By the way, I have a new appreciation for candy corn. Growing up, these were always shunned at Halloween. I mean orange and brown candy never really appealed to me. But this year, I actually ate some at Thanksgiving when I made Turkey Cake Pops and was sold. I had always thought… assumed… they were hard candies. But they're not. They're soft little bites of sugar.

Bunny Corn

They're actually good and taste even better in pretty colors! I can't quit looking at them. They just make me happy!

Bunny Corn

Now, if you were really ambitious, you could make bunnies in coordinating candy corn colors. Blue bunnies, yellow bunnies, pink bunnies and even green ones. Not me. It was enough in pink and white. Those of you that have made pops before know what I mean.

I hope you can find the bunny corn somewhere, but if not, just check out a candy aisle near you and get creative for the bunny ears.

Bunny Cake Pops

I made these with a strawberry cake mix for convenience. Now, I'm not a big strawberry fan, but they were extra YUMMY!

Strawberry Bunny Cake Pops

Here's what I used to decorate:

Pink Candy Melts
White Candy Melts
Jumbo Heart Sprinkles
Pastel Confetti Sprinkles
Pink, Blue & Black edible ink pens
Paper Lollipop Sticks
Styrofoam Block
Paramount Crystals
Pastel Candy Corn
Toothpicks

To decorate:
  • Shape the balls into a bunny head shape.
  • Dip in candy coating color of your choice and let dry.
  • Use the rounded side of a cookie cutter and cut of the end of the candy corn. Dip the end in a little bit of the melted candy coating and adhere it to the top of the bunny head. Hold in place until it sets. If your candy coating isn't too hot, this should just take a few seconds.
  • Let the bunny heads with ears sit in the styrofoam block until all the ears are dry.
  • When dry, use a little bit of melted candy coating to glue the facial features on. Use a toothpick and dab a little of the coating in position for the eyes and nose and adhere the sprinkles.
  • When the eyes and noses are dry, use your pens to draw on the mouth. Then draw on the eye color and pupils.

    (Read the full instructions for making Cake Pops before you begin.)
Note: to get smoother covered pops, make sure your bowl is deep enough to submerge the entire pop. Try to dip it in one dunking motion and remove. If the chocolate is too thick, add some paramount crystals or some shortening to the melted candy coating to thin it out. Remove the pop, holding it in your left hand. tap your left wrist lightly with your right hand and rotate the lollipop stick over your bowl. The excess chocolate should fall off, smoothing out the coating at the same time. Also, make sure the coating surrounds the stick at the base to secure it.

So, there you have it… Easter Bunny Cake Pops. But, we can't have Easter bunnies without Easter eggs. I mean they do go hand in hand, right!

Easter Egg Cake Pops

Stop the cuteness!

Easter Egg Cake Pops

Stop it, I say!

Sprinkles

Don't even look at these sprinkles or you'll be hypnotized. Hurry, close your eyes or the next thing you know, you'll have Easter eggs popping up all over your kitchen.

Easter Egg Cake Pops

I warned you.

Here's what I used to decorate:

Pink Candy Melts
Yellow Candy Melts
White Candy Melts
Pastel Confetti Sprinkles
Sanding Sugars
Light Corn Syrup
Paper Lollipop Sticks
Styrofoam Block
Paramount Crystals
Small Paintbrush
Toothpicks

To decorate:
  • Shape the cake balls into an egg shape.
  • Dip in candy coating color of your choice.
  • Let sit in the styrofoam block until dry.
  • When dry, use a small paint brush to paint on a thin layer of corn syrup in a line around the egg. Do one line at a time. Right after you paint on the syrup, sprinkle on one of the sanding colors until all of the corn syrup is covered. Use a bowl sprinkle over.
  • Repeat with varying designs and colors.
  • You could probably also do this with the melted candy color, but this time I was experimenting and tried the corn syrup.
  • For the confetti sprinkles, either dab a little bit of the candy color with your toothpick and glue on the sprinkle shapes or use a little bit of the corn syrup to act as the glue. The corn syrup will take a little longer to dry.
  • Dry completely.

    (Read the full instructions for making Cake Pops before you begin.)


Easter Egg Cake Pops

Enjoy!